
Have you finally decided that you need to get social with your business and want to start with a a Facebook page , but don’t know where to begin?
Setting up a business page on Facebook is very straight forward. The page has to be associated with a personal account (though your customers don’t have to see your personal timeline) so you must first sign up for a personal Facebook account if you don’t have one.
If you already have one then log in and visit: https://www.facebook.com/pages/create.php and get ready to roll!
Step 1 – choose from one of 6 page classifications:
- Local business or place
- Artist, band, or public figure
- Company, organization, or institution
- Entertainment
- Brand or product
- Cause or community
Step 2 – Choose a category for your business.
Bear in mind that your category and name cannot be changed once your page is created. So give some thought to the category choice otherwise you’ll have to delete the entire page and start again.
Step 3 – Complete Basic Information.
If you choose the business option you will be asked for the company name and further information about your location. Always complete sections in as much detail as possible as the information will help with search results.
Step 4 – upload a profile picture
This will usually be your logo. It will appear as your icon when you comment on a post or appear in a news feed. The profile picture should be 180×180 pixels (though it displays at 120x120pixels). Always ensure that you upload a high-quality image. If your image is not square, then it will be cropped to be so, which means you need to think carefully about what people will see.
Step 5 – complete the About Section.
Here you have 2-3 sentences to describe your company. It will appear on your main page, so make it interesting but succinct. Remember also to include a link to your company website. You should be trying to differentiate your company brand and make your page appealing to potential followers.
Step 6 – use the Admin Panel
This allows you to manage your page. The Edit Page allows you to “Update Info” allows you to extend the information about your company that you added in Step 5. This is only see when someone clicks on your “About” link and so you can write a lengthier description of your business’s USP here.
In this section you can also set up page administrators, allowing chosen employees to respond to comments or messages.
You will be invited to “Build an Audience” but you should be wary about doing this too soon. It would be better to add some great content to your page first in order to give people a reason to return and to engage with your content. So next step is…
Step 7 – Add content to your page.
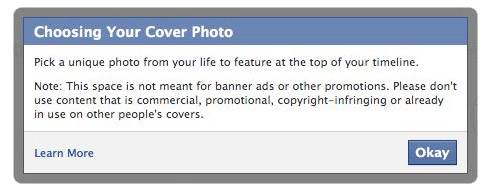
Firstly, add a cover photo. The dimensions of the cover photo are 851 x 315 pixels. If you don’t have the ability to crop a photo to this letterbox shape, don’t worry, you can move the image up and down to display the area you want to appear. However, it is important that you choose a photo which will look right when cropped to letterbox shape.

Note that you are not allowed to use this area for obvious advertising and the image should belong to you:
Creating Custom tabs
Facebook also allows you to have as many tabs on your page as you wish, but you can only choose to show four of them before the visitor has to click the down arrow to see the rest so think carefully about what you want to appear in these four slots, whether it’s events, photos, groups, etc.
Posting to your page
This is the fun bit! Make sure that you post often and add a variety of content. Facebook is picture-lead so always try to use images when you post a comment. If you are linking to a blog post or a website, you will find that Facebook will search for an image on the page to add to your post. You have some control over which image to display.
You can click on the little star on the upper right of any Facebook post todisplay it horizontally across your entire page, making it stand out. It can be used to highlight milestones in your company history or fora company anniversary, product announcements, or any important news.
Step 8 – engage with your followers
All your effort in producing great posts that people want to read will be wasted if you do not engage with people who comment on your posts. Remember that Facebook is social media… you have to get social!


